
At PCL, we refer to the packaging validation process as “The 4 Pillars of Packaging.’ Each pillar represents a section of packaging validation, which is: Make, Ship, Store, and Use.
For the first blog, we will dive into the ‘Make’ pillar of sterile packaging validation. ‘Make’ explains how to make the seal for the sterile barrier system strong enough to make it through transit testing while still being easy enough for the end-user to aseptically present the sterile barrier system into the sterile field where the device can be removed.
The ‘Make’ Pillar
Typically, we get introduced to a project when a medical device manufacturer or a doctor comes to us with a new device they’re ready to bring to market. They need a package to ship it and they have come to us to provide our medical device packaging engineering and validation expertise.
Material selection
The first task at hand is to perform a Product Package Assessment (PPA) so we gather as much information about the device as possible.
Some of the questions we ask during the PPA is:
- What is the device?
- What is the device made of?
- What is its shape?
- Is it sensitive to environmental factors like air, light, or water?
These questions, and many more, help us determine what the right material and packaging design will be for the device. The PPA is simply a way for us to understand your device fully so we know what it will take to keep your device protected!
After completing the PPA, we determine which material and packaging design will be best for the medical device. The next thing to do is decide on packaging equipment.
Equipment
There are a lot of options for packaging equipment on the market. The main types are:
- Pouch Sealers
- Constant Heat Bar
- Impulse
- Tray Sealers
- Form Fill Seal (for rigid or flexible packaging)
The type of equipment required depends on the type and volume of devices that will be manufactured. The higher the volume, the more speedy your packaging equipment will likely need to be, often making an FFS machine a viable option. If your product is low volume, your best option for sealing equipment may be a pouch sealer or Tray sealer.
Once the sealing equipment has been decided on, we must install the equipment and validate that the machinery is going to work correctly.
This is when we begin Installation Qualification (IQ).
IQ / OQ / PQ
Installation Qualification (IQ)
During IQ, a medical device packaging engineer from PCL:
- installs the sealing equipment
- verifies all utilities (water, air, electrical)
- runs a few samples through the sealer to verify that it’s operational
- several other activities specific to the equipment being installed.
An IQ documents all the installation activity that we perform on a piece of equipment. PCL will write a protocol of all the things that must be considered about the machine for that installation based on our knowledge of those packaging systems, our knowledge of the building it’ll live in, and the recommendations from the manufacturer.
It is imperative that sealing equipment is installed correctly because if it’s not, then the machine may not operate correctly or could even become damaged, making it unusable. If packages cannot be sealed, then you are not selling products.
Once an IQ is complete, we’re ready to rock on with an Operational Qualification (OQ)
Operational Qualification (OQ)
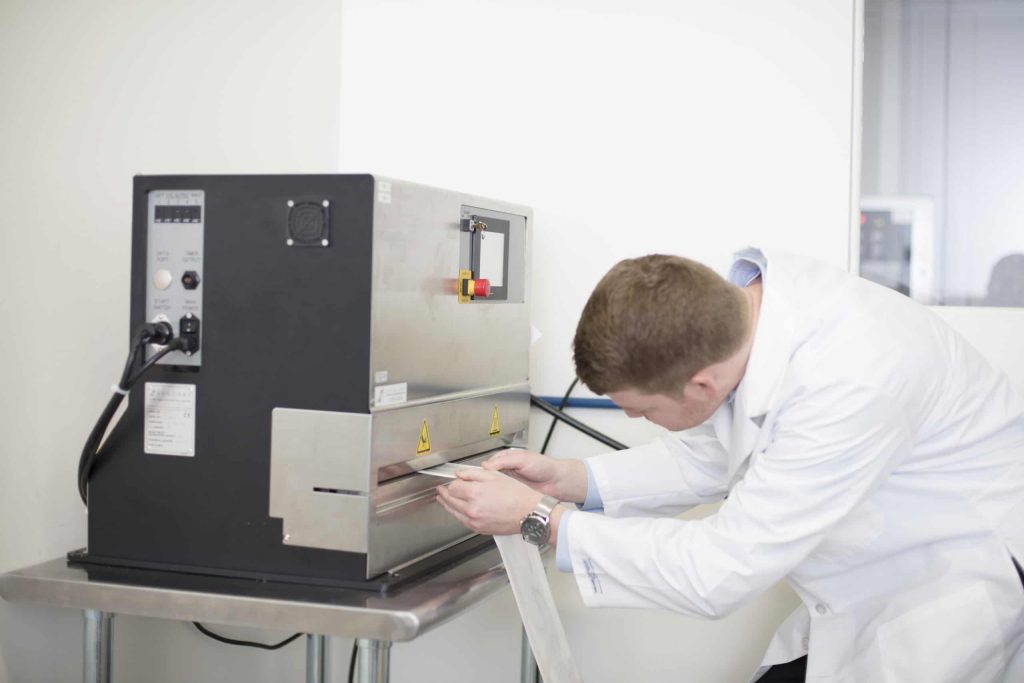
OQ begins with a range-finding exercise. During this exercise, we take a bunch of pouches, suit up, go in the cleanroom, and start the sealer at low settings. The critical factors that go into producing a seal are typically: time, temperature, and pressure.
Seal Setting Range
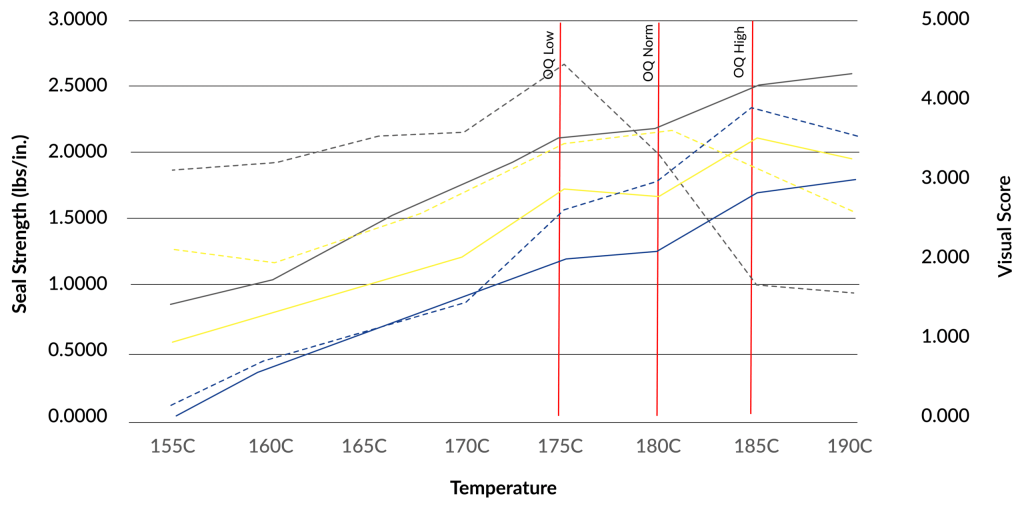
The first settings we will use to create seals will have low time, low temperature, and low pressure. Gradually we will increase the settings. The seals with low settings will be spotty and might not even seal. As the settings increase, the seals will gradually get stronger and better. We continue increasing the time, temperature, and pressure until we observe bad seals. Bad seals will typically have mottling (melting). The best seals will be somewhere in the middle!
Visual Score Range
Once the range-finding exercise is complete, we visually grade the seals. We score seals 1 out of 5 (5 being the best) and then find a range of seals that have a visual score of 5.
Once we have the seals that ranked the best visual grade, we will need to determine what their recipe was and then perform seal strength testing on those.
Seal strength testing is a non-attribute test which means we get numbers data from the test which tells us a lot about the process to produce the seal.
What we are looking for here are consistent values (low standard deviations). If we have seals that look good, but the values are all over the place, we know we’ve got a good looking seal but we don’t have a consistent process.
Temperature Range
What we’re looking for in terms of temperature is the point that provides us the best-looking seal and best strength. Because equipment temperature fluctuates as it is being used, we aren’t able to focus on a single point. In addition to temperature fluctuations during use (the manufacturer will typically list what these fluctuations are), we also need to consider tolerances for calibration. Because we must consider the calibration and temperature fluctuations, we end up with a range of temperatures we must make seals for to find the best “recipe” for a seal!
For example, if our ‘perfect’ point is 180C, our low point would be 175C which makes our high point 185C.

OQ low is the settings at which we make seals to test on the low end. OQ High is the settings at which we make seals on the high end. Nominal (we’ll cover that shortly in the PQ section) is the goldilocks spot.
Now, we run samples for OQ low and OQ high. We will commonly test for visual inspection, dye leak testing, and seal strength. If everything passes in the OQ, we push forward to PQ!
Performance Qualification (PQ)
During PQ, we run samples on the nominal OQ (the sweet spot). One of the differences of PQ besides running it at the nominal setting is that the PQ is supposed to include real or simulated product because it is meant to be a simulation of manufacturing. Typically, you would have a work instruction that you would use, but for testing, we use a PQ protocol.
If a device cannot be provided, we will consider the ‘worst case’ feature of your device and find objects that emulate that worst-case feature. For example, if your device is an orthopedic device, the worst-case feature of your device will probably be weight. For this, we would make sure the object(s) used to simulate the device are heavy!
If all the tests pass in this phase, we push on to transit testing.
To recap, the ‘Make’ pillar is all about ensuring we have a process for producing seals that is repeatable and reproducible. OQ & PQ tell us that the seal is good at the extremes & normal point of use with the product.
For the sake of length, we’ll end the blog here and continue on with ‘Ship’ (transit testing), ‘Store’ (Aging), and ‘Use’ (usability evaluation) in the coming weeks!
Want to learn how PCL can take care of your medical device packaging validation? If so, or if you have other questions about sterile packaging processes and validation contact us today!